

생각하는 감쟈
[Python] 3-2) 정규표현식, 워드클라우드 본문
14일차 (23.03.30)

2. 데이터 수집
3) 정규표현식
4) 네이버 뉴스에서 URL과 제목 가져와서 파일로 저장
6) 표에서 내용 가져오기
3. 워드클라우드
1) 네이버에서 오늘자 랭킹뉴스 가져오기
2) 워드클라우드 만들기
2-1 글자이상 명사만 추출
2-2 한글폰트 설치하고 지정
2-3 파일로 저장
3) 마스크 씌우기
4) 스탑워드 적용하기
정규 표현식
[abc] 대괄호 안에 있는 문자 1개 인식 a or b or c와 같음
[^abc] 대괄호 안에 있는 문자가 아닌 문자를 인식(NOT 연산) a, b, c 이외의 문자
[0-9] 0부터 9까지의 범위 중 한 문자 인식
[a-zA-Z] 소문자, 대문자를 인식
[a-z&&[def]] a~z까지 1문자 and d/e/f 중 1글자 인식
[ ] 문자의 집합 또는 범위를 나타냄 대괄호 안의 ^ 표시는 NOT을 뜻함
{ } 횟수 또는 범위를 나타낸다.
( ) 소괄호 안의 문자를 하나의 그룹으로 인식
. 임의의 한 문자 단, \는 넣을 수 없음
* 앞 문자가 0개 이상 존재
+ 앞 문자가 1개 이상 존재
? 앞 문자가 없거나 하나 존재
^ 문자열의 시작
$ 문자열의 종료
| 패턴 안에서 or 연산 수행
&& 패턴 안에서 and 연산 수행
\s 공백문자. \t\n\x0B\f\r
\S 공백 문자가 아닌 나머지 문자 [^\s]와 동일
\w 영숫자와 _(언더바) [a-zA-Z_0-9]와 동일
\W 영숫자를 제외한 문자 [^\w]와 동일
\d 숫자 [0-9]와 동일
\D 숫자를 제외한 모든 문자 [^0-9]와 동일
\ 확장문자 \ 다음에 일반 문자가 오면 특수문자로 취급
(?i) 대소문자를 구분하지 않음
네이버 뉴스에서 URL과 제목 가져와서 파일로 저장
#네이버 뉴스에서 url과 제목 가져와서 파일로 저장

import requests
from bs4 import BeautifulSoup
import pandas as pd

# 힌트: url은 title 안에 들어 있다. title['href']

# 뉴스 제목만 csv 파일로 저장했던 코드를 수정해서 만들어 보자 (어제 수업에서 복사)
def getNews(keyword, p, sort, fname):
    newslist = []

    for k in keyword.split():
        print("\n\n===",k,'===')
        for i in range(p):  # 5==>0,1,2,3,4
            start = i * 10 + 1  # 1,11,21,31,41
            url = f"https://search.naver.com/search.naver?where=news&sm=tab_pge&query={k}&sort={sort}&photo=0&field=0&pd=0&ds=&de=&cluster_rank=13&mynews=0&office_type=0&office_section_code=0&news_office_checked=&nso=so:r,p:all,a:all&start={start}"
            response = requests.get(url)

            html = response.text
            bs_obj = BeautifulSoup(html, "html.parser")

            titles = bs_obj.select('.news_tit')

            for title in titles:
                newslist.append(title.text)
                print(title["href"])

    df = pd.DataFrame({'뉴스제목': newslist})
    df.to_csv(fname)


keyword = input('어떤 내용을 검색하시겠습니까? ')
page = int(input('몇 번째 페이지까지 읽어오겠습니까? '))
getNews(keyword, page, 1, "네이버뉴스.csv")

df = pd.read_csv("네이버뉴스.csv")
df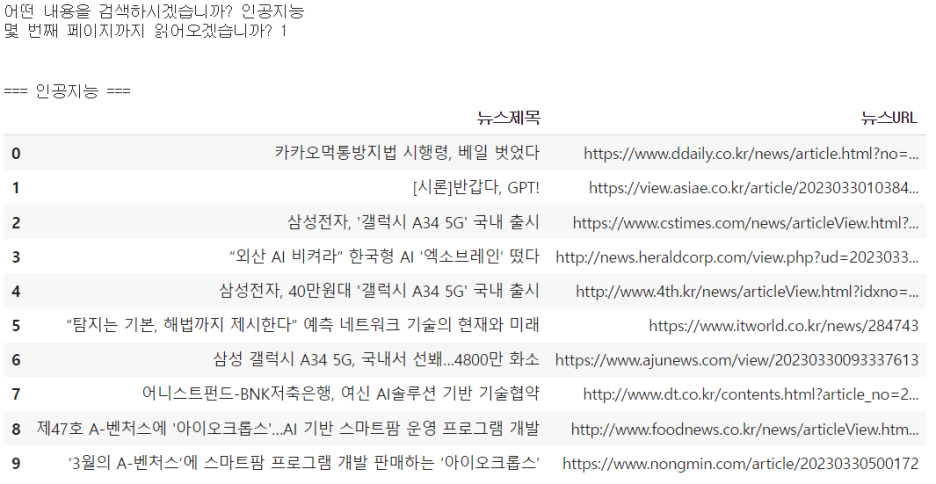
#커피쇼핑몰에서 상품정보 가져오기
import requests
from bs4 import BeautifulSoup
import pandas as pd
import re


regex = re.compile(r'\d{1,3}(,\d{3})*')


# 상품명과 가격 정보를 저장할 리스트
mega_names =[]
mega_prices = []

for page in range(1,6):
    url = f'https://www.megacoffee.co.kr/goods/goods_list.php?page={page}&cateCd=001'

    # 해당 url에서 가져온 데이터 저장
    data = requests.get(url)

    # html.parser를 이용해 content만 가져옴
    soup = BeautifulSoup(data.content, 'html.parser')

    # 태그가 div이고 class='item_cont'인 부분만 리스트로 가져옴
    lists = soup.find_all('div', attrs={'class':'item_cont'})

    # 리스트 하나에 제품 정보 하나가 있으므로, 하나씩 순회하며 item_tit_box와 item_money_box에 해당하는 값만 읽어옴
    for tr in lists:
        name = tr.select_one('div.item_info_cont > div.item_tit_box > a > strong').text
        price = tr.select_one('div.item_info_cont > div.item_money_box > strong').text.strip()
        # '34,500\n\t\t\t\t\t\t\t원'
        #price_real = price[0:7].strip()

        price_real = regex.search(price)
        #print(price_real)
        mega_names.append(name)
        mega_prices.append(price_real.group())

mega_df = pd.DataFrame({"상품명":mega_names, "가격":mega_prices})
mega_df.to_csv('mega_coffee.csv')

mega_df.head(5)
# 메가커피에서 스타벅스 제품만 2페이지 가져와서 "starbucks.csv"에 저장하기
import requests
from bs4 import BeautifulSoup
import pandas as pd
import re
regex = re.compile(r'\d{1,3}(,\d{3})*')
# 상품명과 가격 정보를 저장할 리스트
mega_names =[]
mega_prices = []
for page in range(1,3):
url = f'https://www.megacoffee.co.kr/goods/goods_list.php?page={page}&brandCd=391'
# 해당 url에서 가져온 데이터 저장
data = requests.get(url)
# html.parser를 이용해 content만 가져옴
soup = BeautifulSoup(data.content, 'html.parser')
# 태그가 div이고 class='item_cont'인 부분만 리스트로 가져옴
lists = soup.find_all('div', attrs={'class':'item_cont'})
# 리스트 하나에 제품 정보 하나가 있으므로, 하나씩 순회하며 item_tit_box와 item_money_box에 해당하는 값만 읽어옴
for tr in lists:
name = tr.select_one('div.item_info_cont > div.item_tit_box > a > strong').text
price = tr.select_one('div.item_info_cont > div.item_money_box > strong').text.strip()
# '34,500\n\t\t\t\t\t\t\t원'
#price_real = price[0:7].strip()
price_real = regex.search(price)
#print(price_real)
mega_names.append(name)
mega_prices.append(price_real.group())
mega_df = pd.DataFrame({"상품명":mega_names, "가격":mega_prices})
mega_df.head()
표에서 내용 가져오기

td0 = []
td2 = []
td3 = []

for tr in trs:
    tds = tr.findAll('td')
    # print(tds[0].text.strip())
    # print(tds[2].text.strip())
    # print(tds[3].text.strip())
    # print(tds[4].text.strip())
    # print(tds[5].text.strip())
    # print()
    td0.append(tds[0].text.strip())
    td2.append(tds[2].text.strip()[:-3])
    td3.append(tds[3].text.strip())
df = pd.DataFrame({'번호': td0, '제품명': td2, '제조사': td3})
df.head()
워드 클라우드
네이버에서 오늘자 랭킹뉴스 가져오기
from datetime import datetime

# 현재 날짜와 시간을 나타내는 datetime 객체 생성
now = datetime.now()

# 연도, 월, 일 추출
year = str(now.year)
month = str(now.month).zfill(2)
day = str(now.day).zfill(2)

# 연도, 월, 일을 이용하여 문자열 생성
date = year + month + day

print(date)  # 출력: 예를 들어 20230330
워드클라우드 만들기
!pip install konlpy # 형태소 분석from wordcloud import WordCloud
from collections import Counter
from konlpy.tag import Okt
# 명사만 추출

okt = Okt()
nouns = okt.nouns(title_list) # 명사만 추출
print(nouns)
# 2글자 이상 명사만 추출
words = [n for n in nouns if len(n) > 1]
# words=[]
# for n in nouns:
# if len(n)>1:
# words.append(n)
counted_words = Counter(words)
print(counted_words)한글폰트 설치하고 지정
!apt-get update -qq
!apt-get install fonts-nanum* -qq
import matplotlib.font_manager as fm
sys_font = fm.findSystemFonts()

fonts = [f for f in sys_font if 'Nanum' in f]
fonts
# 워드클라우드 생성
wc = WordCloud(font_path=fonts[0], # font_path='/usr/share/fonts/truetype/nanum/NanumMyeongjoEco.ttf'
background_color="white",
width=400, height=400, scale=2.0, max_font_size=250)
gen = wc.generate_from_frequencies(counted_words)# 워드클라우드 그리기
import matplotlib.pyplot as plt
plt.figure(figsize=(6,6))
plt.imshow(wc)
plt.axis('off')
plt.show()
마스크 씌우기
from PIL import Image
import numpy as np

mask = np.array(Image.open("img.png"))
wc = WordCloud(font_path=fonts[0], # font_path='/usr/share/fonts/truetype/nanum/NanumMyeongjoEco.ttf'
background_color="white",
mask = mask,
width=400, height=400, scale=2.0, max_font_size=250)
wc.generate_from_frequencies(counted_words)
plt.figure(figsize=(6,6))
plt.imshow(wc)
plt.axis('off')
plt.show()
!pip install kiwipiepy
from kiwipiepy import Kiwi
kiwi = Kiwi()
result = kiwi.tokenize(title_list)
words = [n.form for n in result if n.tag in ['NNG', 'NNP']]
print(words)스탑워드 적용하기
stopwords = set()
stopwords.add("전두환")
stopwords.add("대통령")
# stopwords = {"대통령","전두환"}
no_stopwords = [n for n in nouns if not n in stopwords]
words = [n for n in no_stopwords if len(n) > 1]
counted_words = Counter(words)wc = WordCloud(font_path=fonts[0], # font_path='/usr/share/fonts/truetype/nanum/NanumMyeongjoEco.ttf'
background_color="white",
mask = mask,
width=400, height=400, scale=2.0, max_font_size=250)
wc.generate_from_frequencies(counted_words)
plt.figure(figsize=(6,6))
plt.imshow(wc)
plt.axis('off')
plt.show()
!pip install kiwipiepy# 개인 PC에 JVM이 설치되어 있지 않은 경우
from kiwipiepy import Kiwi
kiwi = Kiwi()
result = kiwi.tokenize(title_list)
words = [n.form for n in result if n.tag in ['NNG', 'NNP']]
print(words)counted_words = Counter(words)
# 폰트는 본인 노트북에서 폰트 찾아서 경로를 넣으세요. C:\Windows\Fonts\......
# mask를 씌울 경우, 이미지파일을 ipynb파일과 같은 위치에 넣거나, 전체 경로를 다 적어주세요.
wc = WordCloud(font_path=fonts[0],  # font_path='/usr/share/fonts/truetype/nanum/NanumMyeongjoEco.ttf'
               background_color="white",
               mask = mask,
               width=400, height=400, scale=2.0, max_font_size=250)
wc.generate_from_frequencies(counted_words)

plt.figure(figsize=(6,6))
plt.imshow(wc)
plt.axis('off')
plt.show()

#ABC부트캠프 #부트캠프 #유클리드소프트 #파이썬 #고용노동부 #한국산업인력공단 #청년친화형 #ESG지원사업 #대전 #서포터즈 #python #Ai #Bigdata #cloud #대외활동 #대학생 #daily
'Language > Python' 카테고리의 다른 글
| [Python] 4-2) 머신러닝 - 지도학습 알고리즘 (1) | 2023.04.13 |
|---|---|
| [Python] 4-1) 머신러닝 기초 (0) | 2023.04.06 |
| [Python] 3-1) 데이터 수집 및 크롤링 (0) | 2023.03.30 |
| [Python] 2-5) Matplotlib 2 (0) | 2023.03.29 |
| [Python] 2-5) Matplotlib 1 (0) | 2023.03.29 |